Fill & bleed a Porsche 944/924S cooling system (no airlocks)
Cold-engine method: fill block and head, crack the 12 mm bleed screw, and clear airlocks without jacking the car at odd angles.
Contents
Filling and bleeding the cooling system on a Porsche 924S or 944 after a complete drain attracts a lot of conflicting advice: nose-high on jack stands, tail-high, lifting one corner… In practice it is simpler than most write-ups suggest. Air always wants to rise; you need the two highest points in the system and you need to fill both halves while the engine is cold.
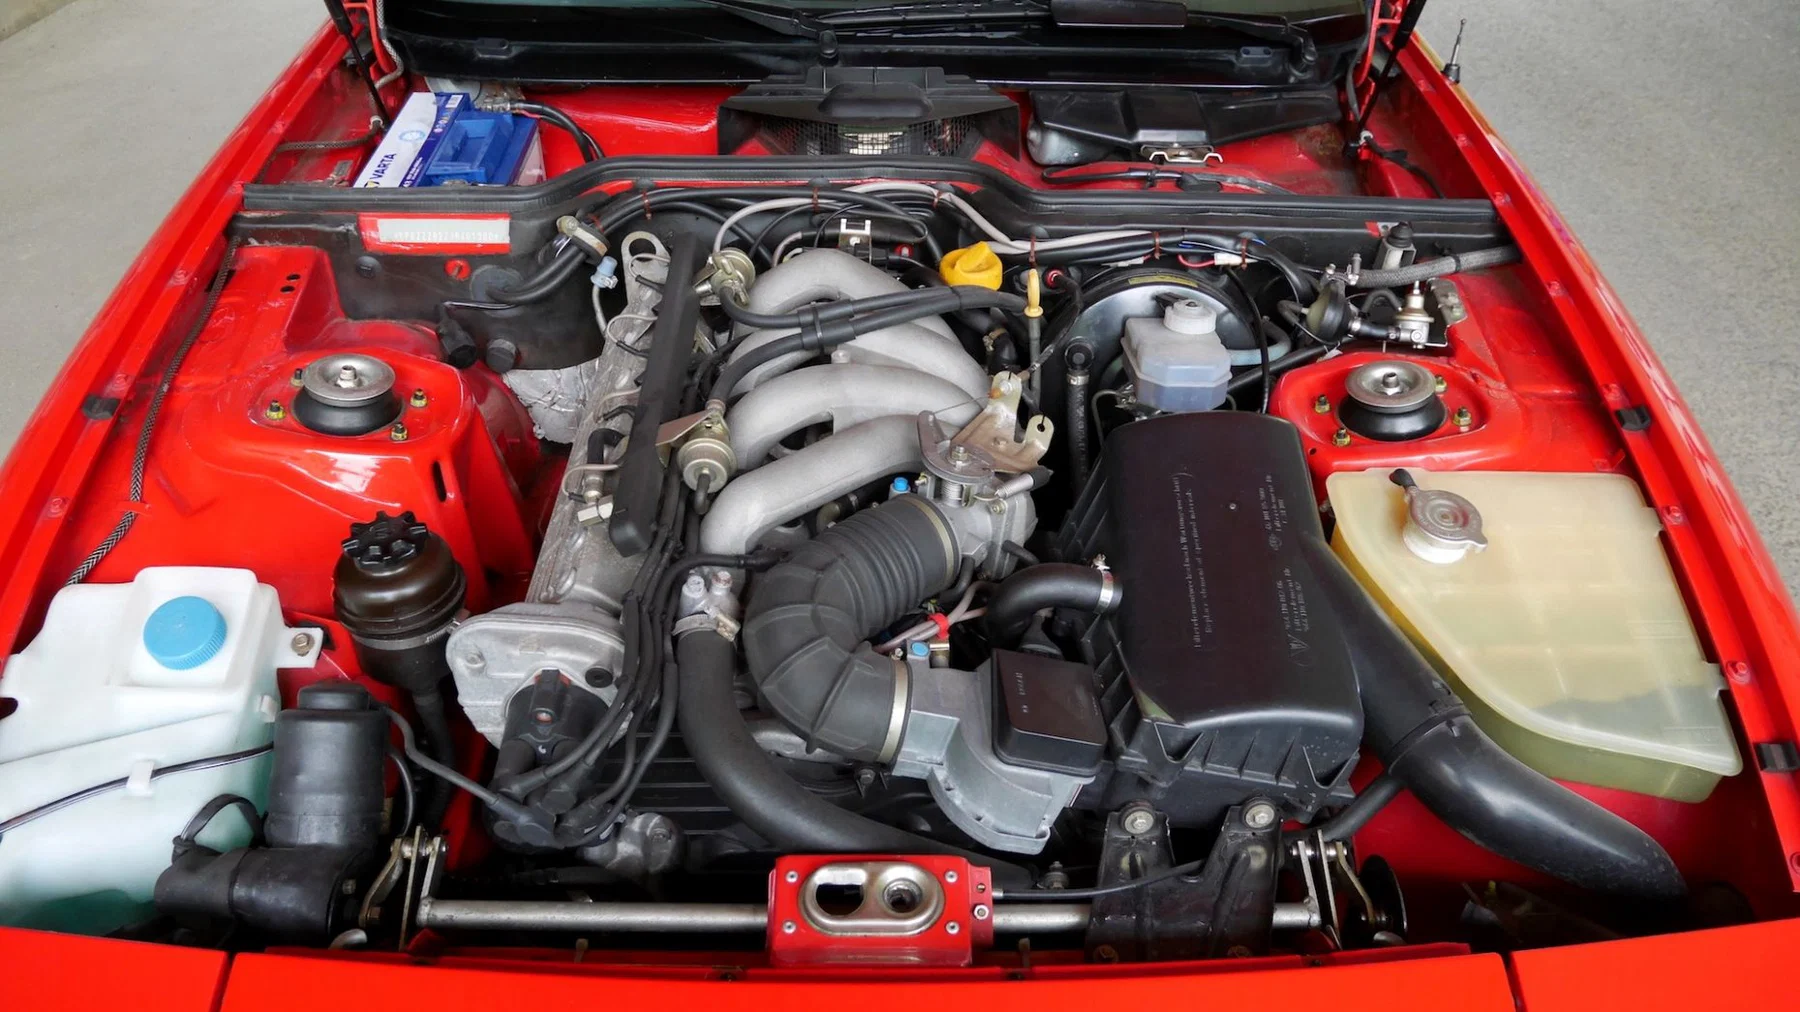
Cold engine: two separate halves
With a cold engine the circuit is split in two at the thermostat, housed in the water pump.
Rear half (behind the thermostat): block, cylinder head, heater core.
Front half: hoses, main radiator, expansion tank.
You can fill through the expansion tank cap, but for the rear half it is often more effective to fill straight into the block and head. That is where most air stays trapped after a complete drain.
You do not need dramatic car angles on jack stands. Air finds the high points; targeted filling and running the engine does the work, not exotic tilting.
Water flow on the M44 (useful reminder)
On these engines coolant leaves the water pump toward the back of the block, flows around the cylinders, rises through the four rear passages into the head, runs forward through the head galleries, then either:
- thermostat closed: back to the pump;
- thermostat open: out the upper hose and through the radiator.
That flow explains why air sits behind the thermostat until the engine has run and warmed up.
The two highest bleed points
Focus on these two openings during bleeding:
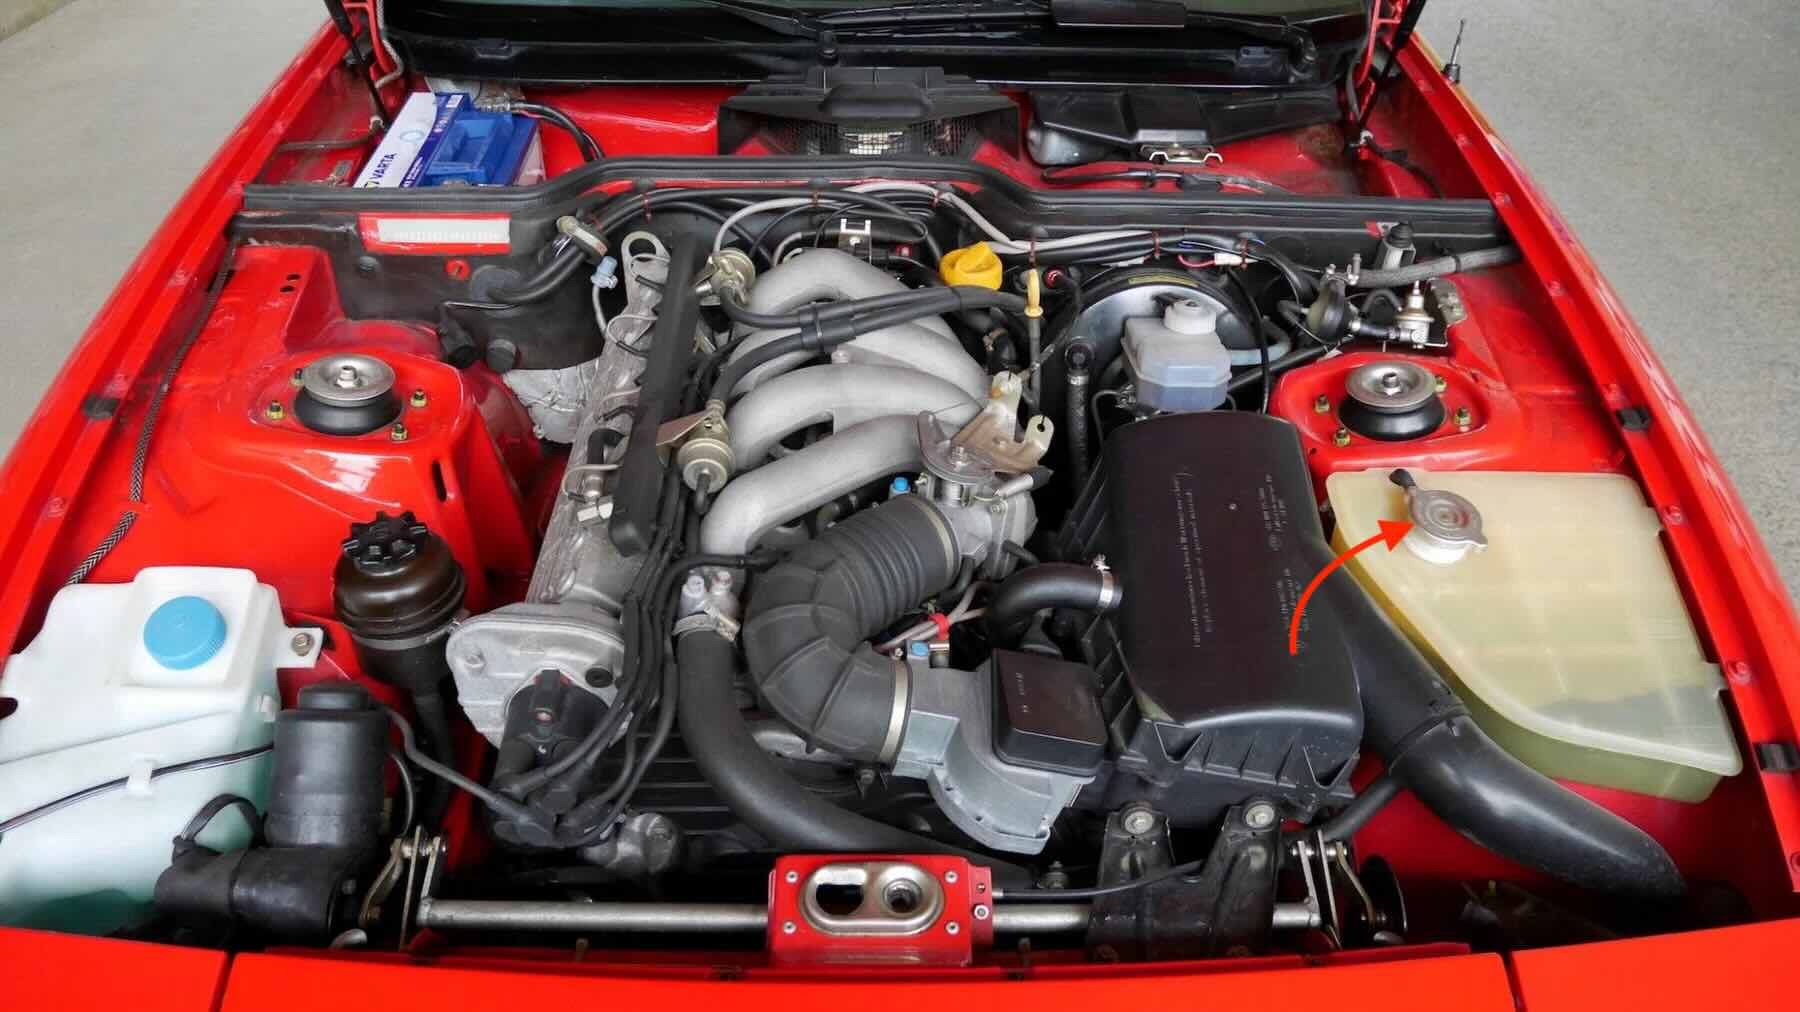
- Expansion tank cap (front of the circuit).
- 12 mm bleed screw at the top centre of the engine (rear half).
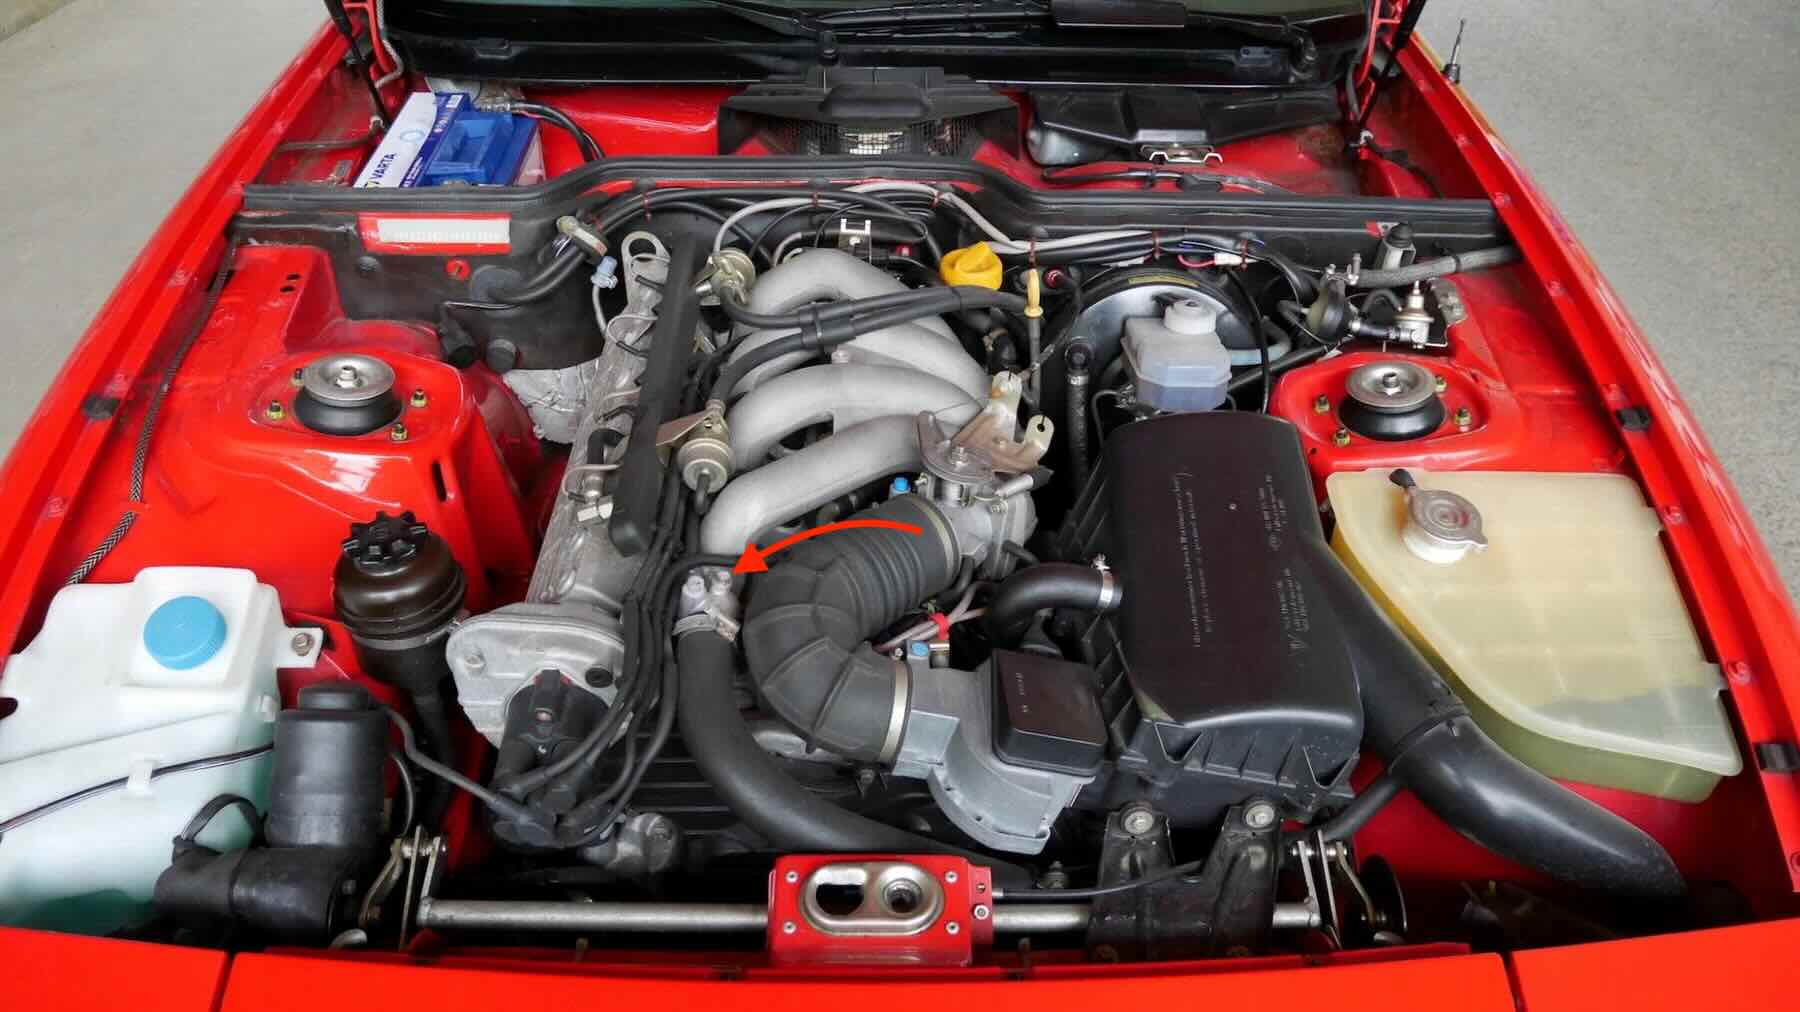
Any leftover air will migrate to one of these when you run the engine.
Filling the front half
Open the expansion tank cap and fill until the level rises. On a cold engine this mainly feeds the radiator and hoses ahead of the thermostat. Good first step, but only half the circuit is filled.
Filling block and head
For the rear half, a common shop trick is a cut lower radiator hose used as a funnel:
- Remove the upper radiator hose.
- Insert the cut hose into the opening and point it up: you get a wide opening to pour coolant straight toward the block and head.
- Loosen the 12 mm bleed screw so air can escape while you fill.
Cut an old hose rather than buying a new part just for this job.
Direct head access (without a «tool» hose)
Without an old radiator hose, there is another method that fills the rear half of the circuit just as well, with a bit more disassembly.
Remove the water pipe from the head to open direct access to the galleries. Fit a standard funnel while you pour coolant: the block and head fill just as effectively as with the cut hose.
On reassembly, fit a new gasket on the water pipe rather than reusing the old one: after removal to fill the head, a tired gasket is a common cause of cooling-system leaks.
Available in our shop Water pipe for Porsche 924S & 944 Shop now
Push air forward: blow into the expansion tank
When the system is nearly full you can still move stubborn air:
- Remove the expansion tank cap.
- Hold a clean rag (not soaked in solvent) over the neck.
- Blow through the rag: pressure pushes coolant down the crossover hose, through the radiator, up the upper hose, and into the head. Coolant may spit from the 12 mm bleed screw as air leaves with it.
Coolant path: tank → crossover → radiator (right tank, through core, left tank) → upper hose → head → block.
Only four small holes at the back of the cylinder head connect block coolant to the head galleries. That is why rear-half filling matters, not just topping the tank.
Alternate: hose siphon from the tank
Same idea, different hands: bleed screw open, pinch the upper hose shut with your hand, close the 12 mm screw briefly, release the hose: vacuum pulls coolant from the expansion tank. Blowing into the tank neck is usually quicker in a workshop.
Final bleed: hot engine
- Retighten the 12 mm screw moderately (fresh washer if needed).
- Refit the expansion tank cap.
- Start the engine, let it warm, rev slightly a few times to push water through the head and heater core.
- Set heat to full and turn the blower on max: when the air is gone you get a sudden blast of hot air from the vents.
- Drive for ten minutes or so, then crack the 12 mm screw once more on a warm engine for a final check bleed.
Gauge reads hot but the engine is fine
If a large air pocket remains, the temperature sender can sit in steam instead of liquid coolant. The gauge reads hot even though the engine is not actually overheating. A proper bleed often fixes that before you replace anything else.
Frequently asked questions
Do I need to lift the car?
No, not for a normal post-drain or post-repair bleed. The high points are the expansion tank and the 12 mm screw on the head.
What coolant should I use?
Follow Porsche specifications for your year and climate (water/antifreeze mix, freeze and corrosion protection). Do not mix incompatible products.
The 12 mm screw leaks after bleeding
Check the aluminium washer under the screw and your tightening torque. Overtightening or reusing a crushed washer often causes weeping.
Why is the heater still cold?
Usually air in the heater core. Fill the rear half, run the engine with heat and fan on max until hot air reaches the vents.
Going further
While the cooling system is open, two other jobs pair well:
- Oil leak at the same time? Replacing the oil sump gasket without removing the engine.
- Other small improvements: 5 affordable modifications for Porsche 924S/944.
Questions about cooling parts: contact us.