Short Throttle Wheel Installation for Porsche 924S and 944
This guide covers installing the short throttle wheel on Porsche 924S and 944. The steps below cover removal, fitting the new wheel, cable and pedal stop adjustment, and the precautions needed to avoid unstable idle (throttle switch and nut torque).
Required Tools
For throttle wheel installation you will need:
- 2 × 13 mm open-end wrenches
- 1 × 19 mm open-end wrench
Important Notes
Tightening the nut that holds the throttle wheel securely is important, but be careful not to overtighten it. Overtightening can cause abnormal engine idle.
Porsche uses a switch to tell the ECU (DME) that the throttle plate is fully closed. If this switch is not activated, idle will be unstable. Overtightening the nut keeps the throttle plate slightly open and prevents the switch from activating, which tells the ECU to stabilize idle. The engine will then idle at around 2,000 rpm.
To check nut tightness, listen for the throttle opening and closing. Manually open the throttle, then close it slowly while listening carefully. You should hear a click when the throttle is fully closed—that is the switch activating. If you do not hear a click, the nut is probably too tight.
Throttle Wheel Installation
| Step | Instructions | Image |
|---|---|---|
| 1 | Open the bonnet and locate the throttle wheel | 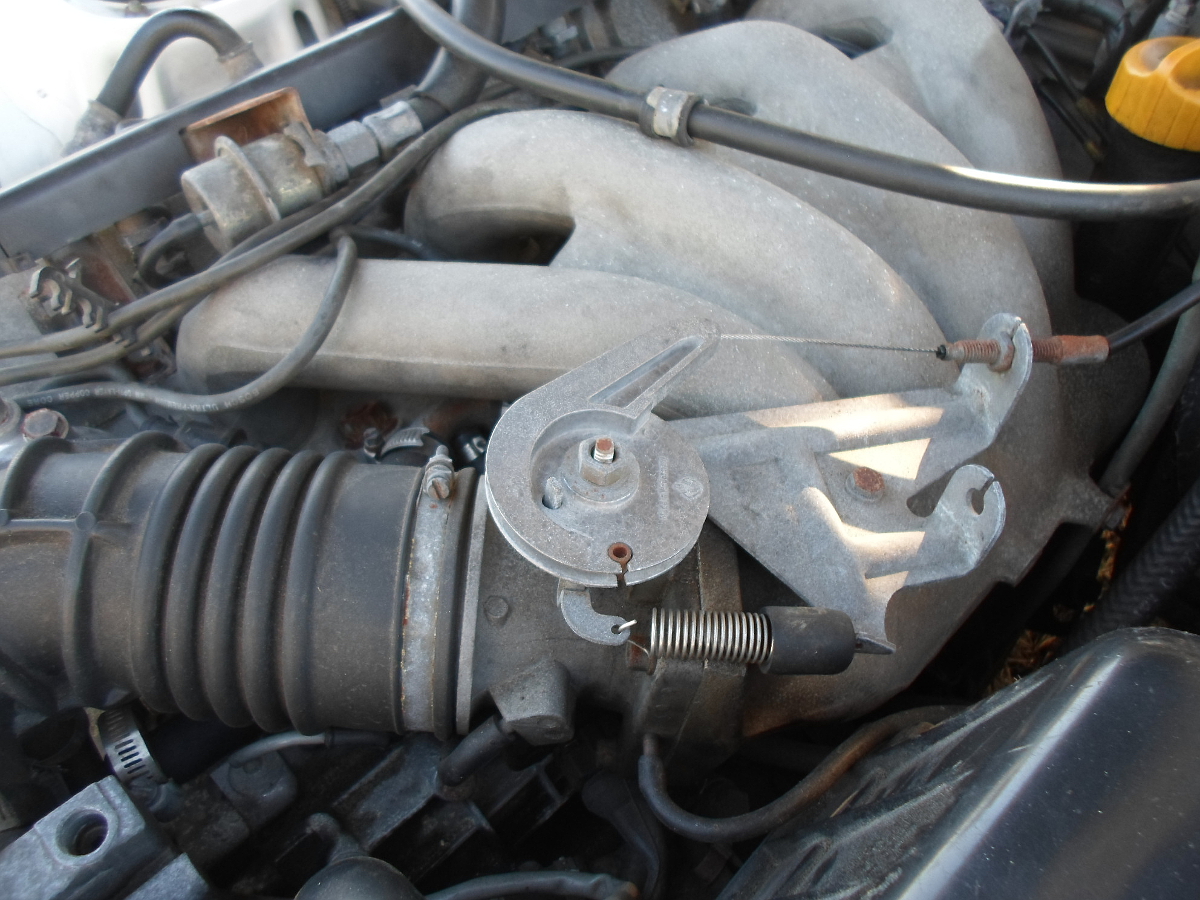 |
| 2 | Remove the throttle cable before loosening the nut. Hold the throttle open with one hand, then slide the throttle cable off the wheel. | 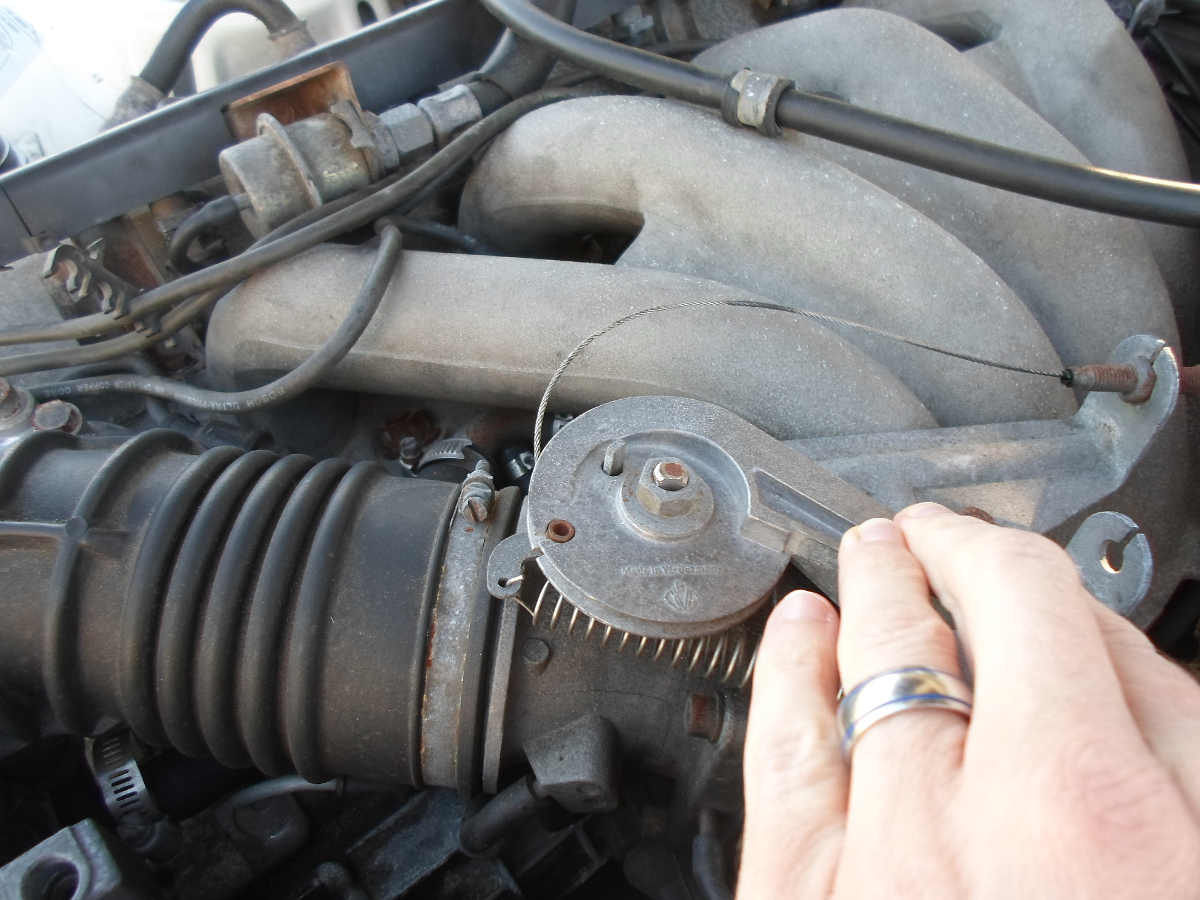 |
| 3 | Remove the 13 mm nut on top of the throttle wheel. This nut must not be overtightened. When loosening, avoid doing it against the throttle body. Hold the wheel at mid-travel, then loosen the nut. This avoids putting stress on the internal parts. | 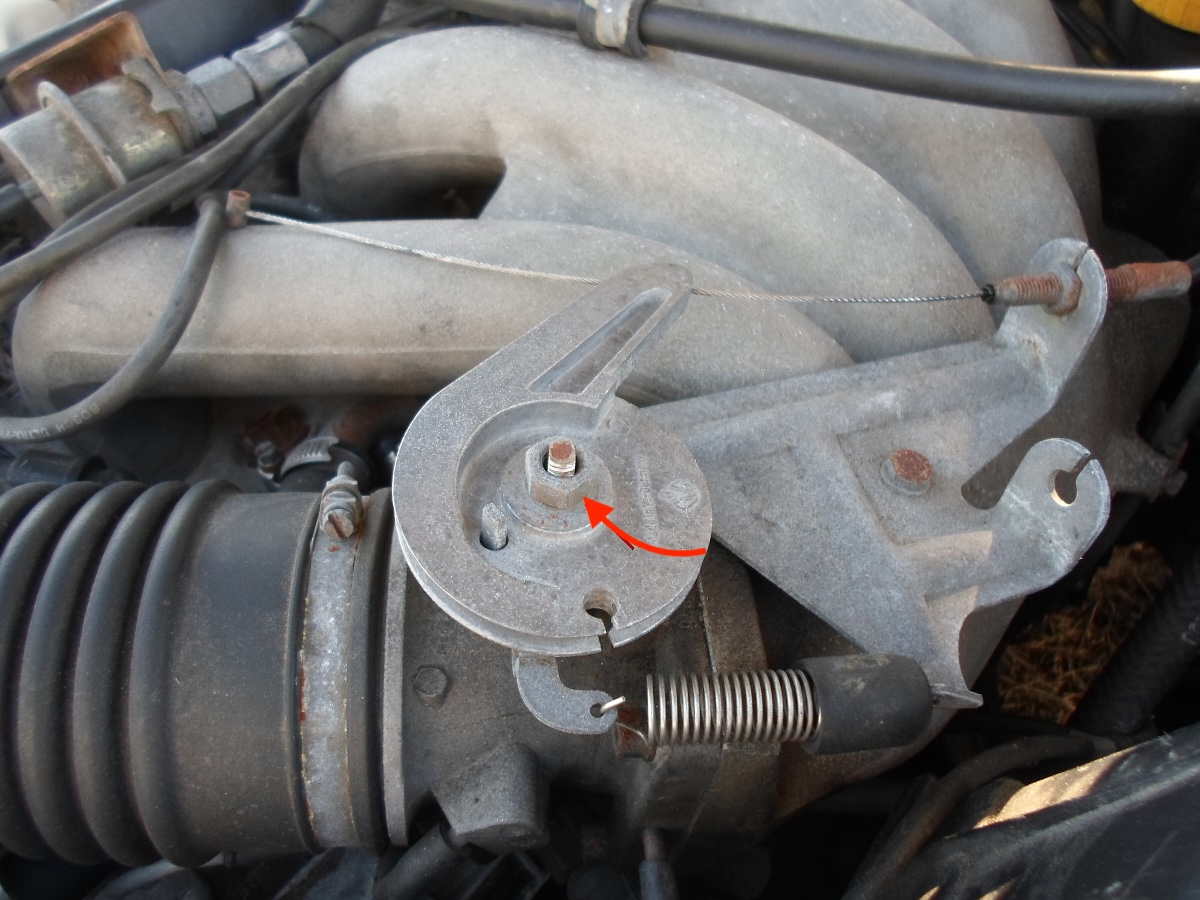 |
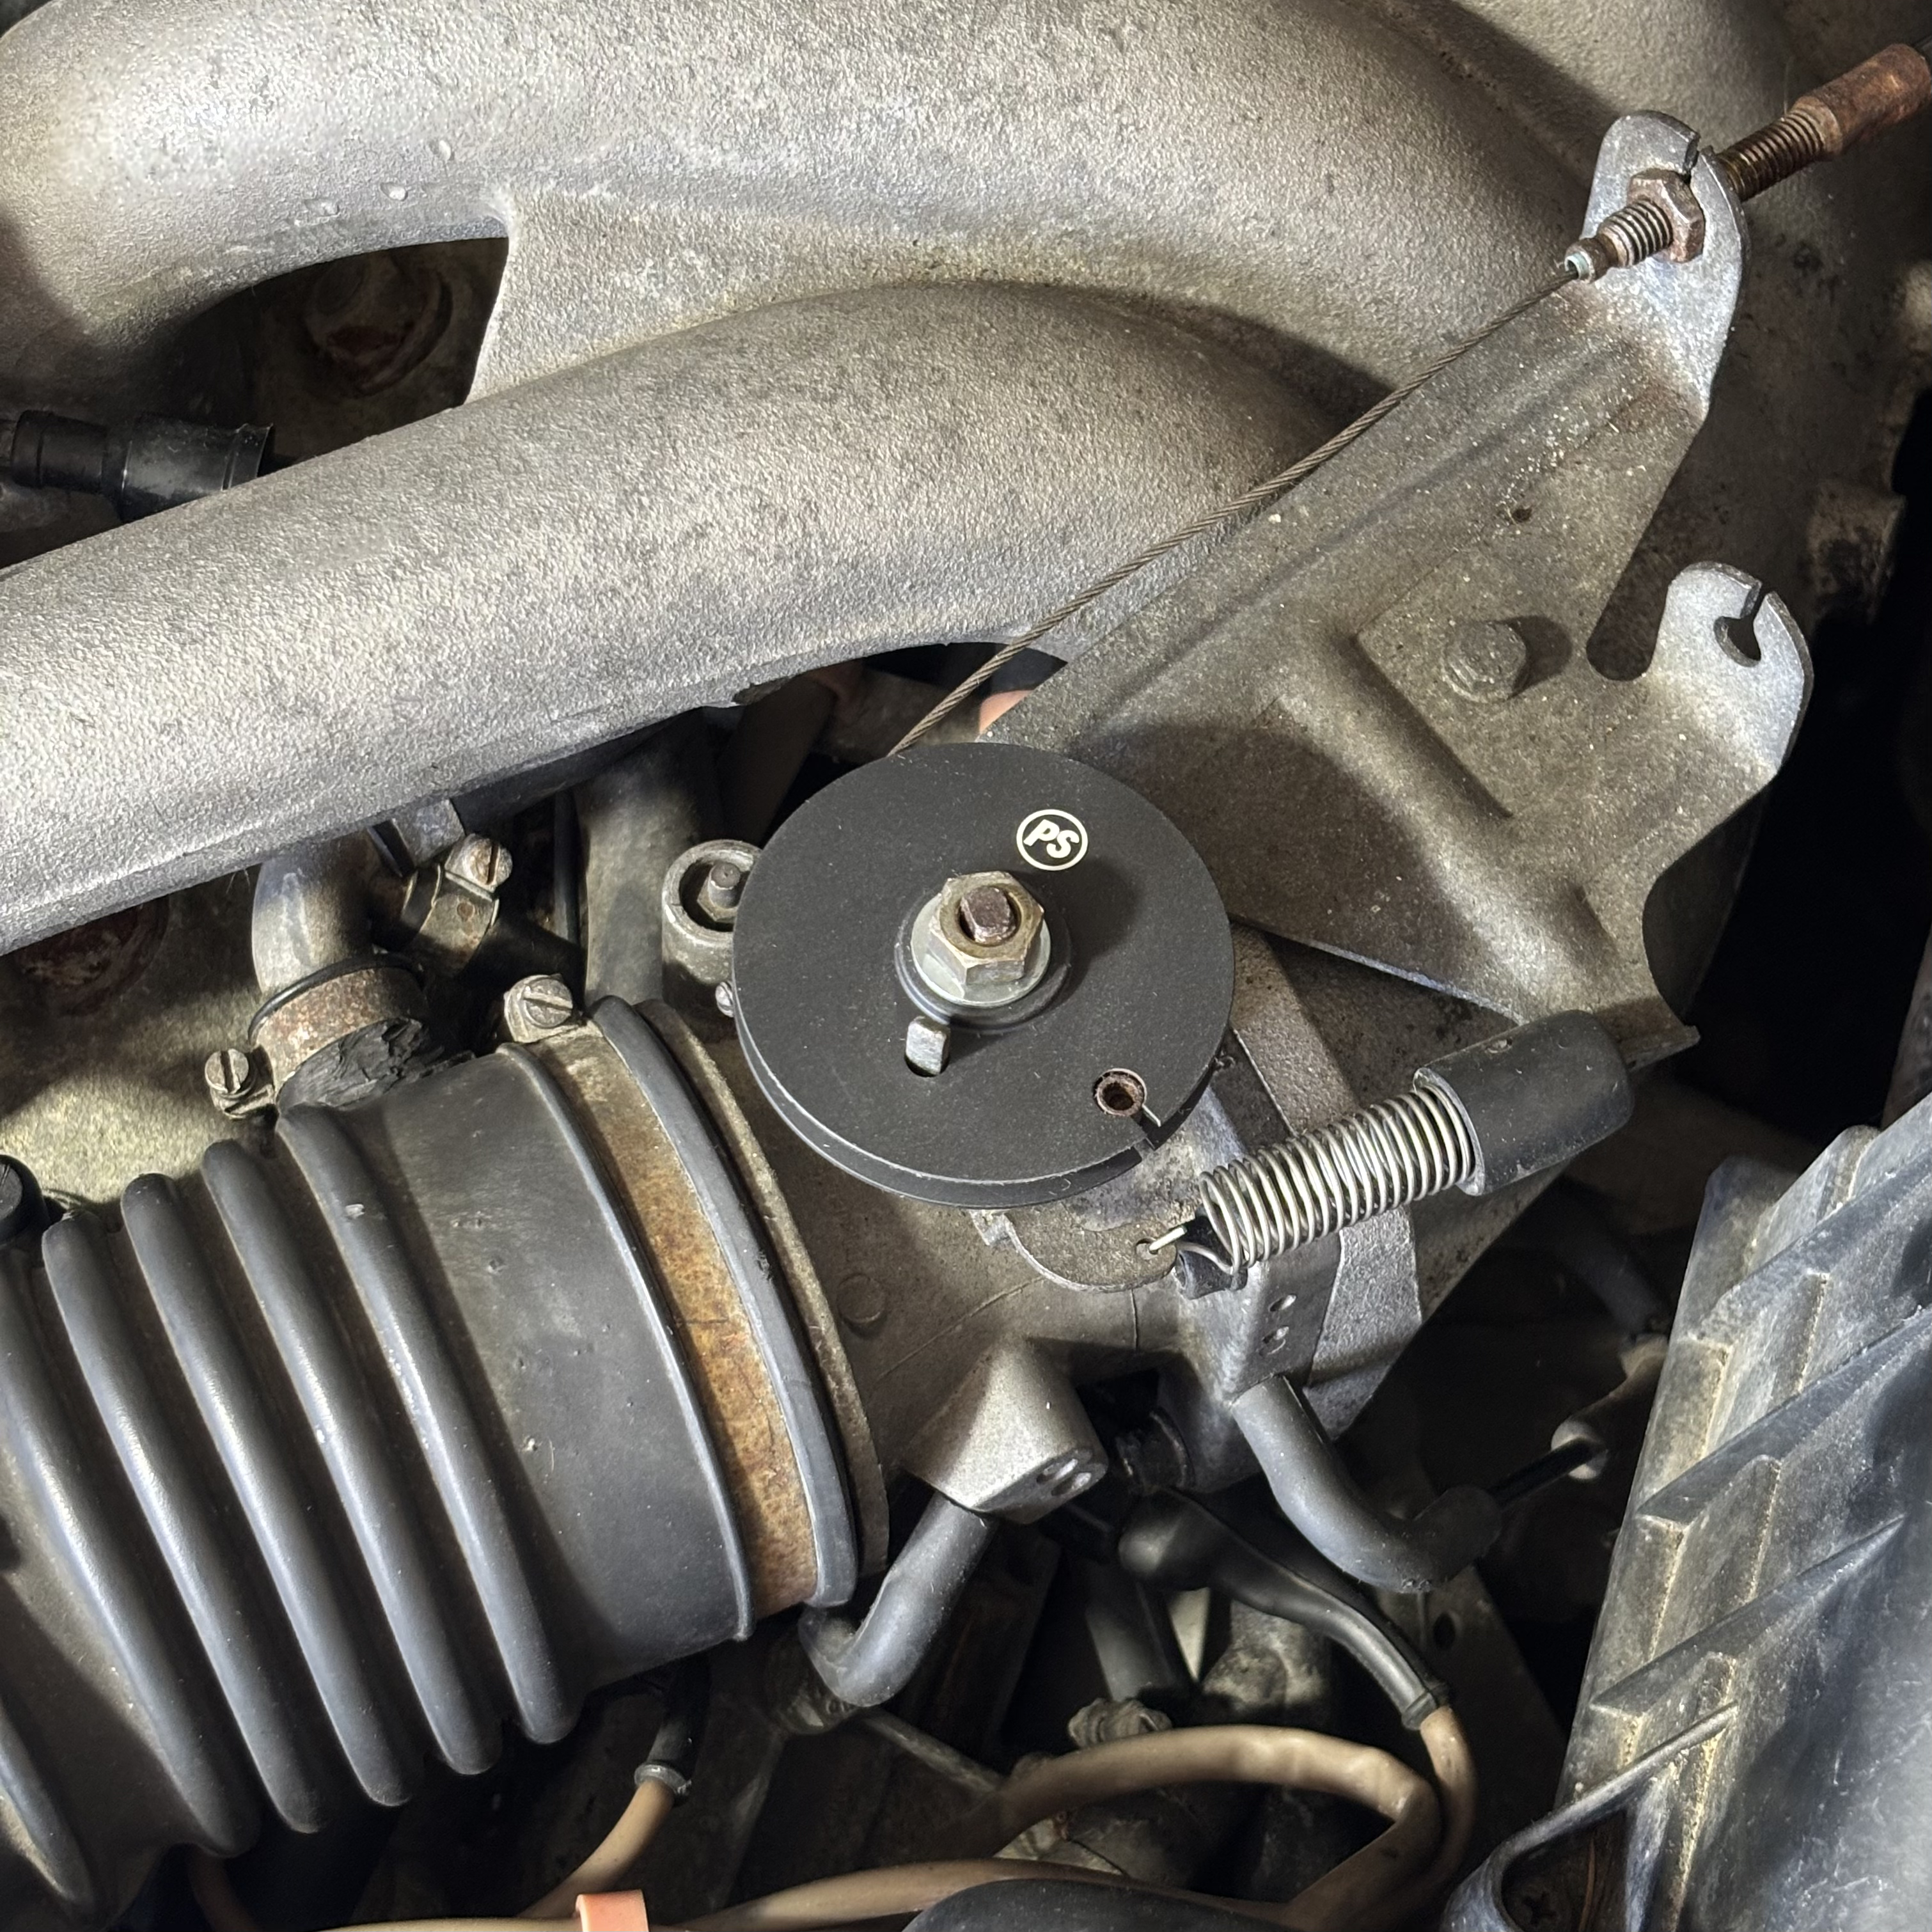
| 4 | Slide the new wheel onto the throttle body. Install the cable, washer and nut on the wheel. IMPORTANT: Overtightening the nut keeps the throttle plate slightly open and prevents the switch from activating, which tells the ECU to stabilize idle. To check nut tightness, listen for the throttle opening and closing. Manually open the throttle, then close it slowly while listening carefully. You should hear a click when the throttle is fully closed. |
 |
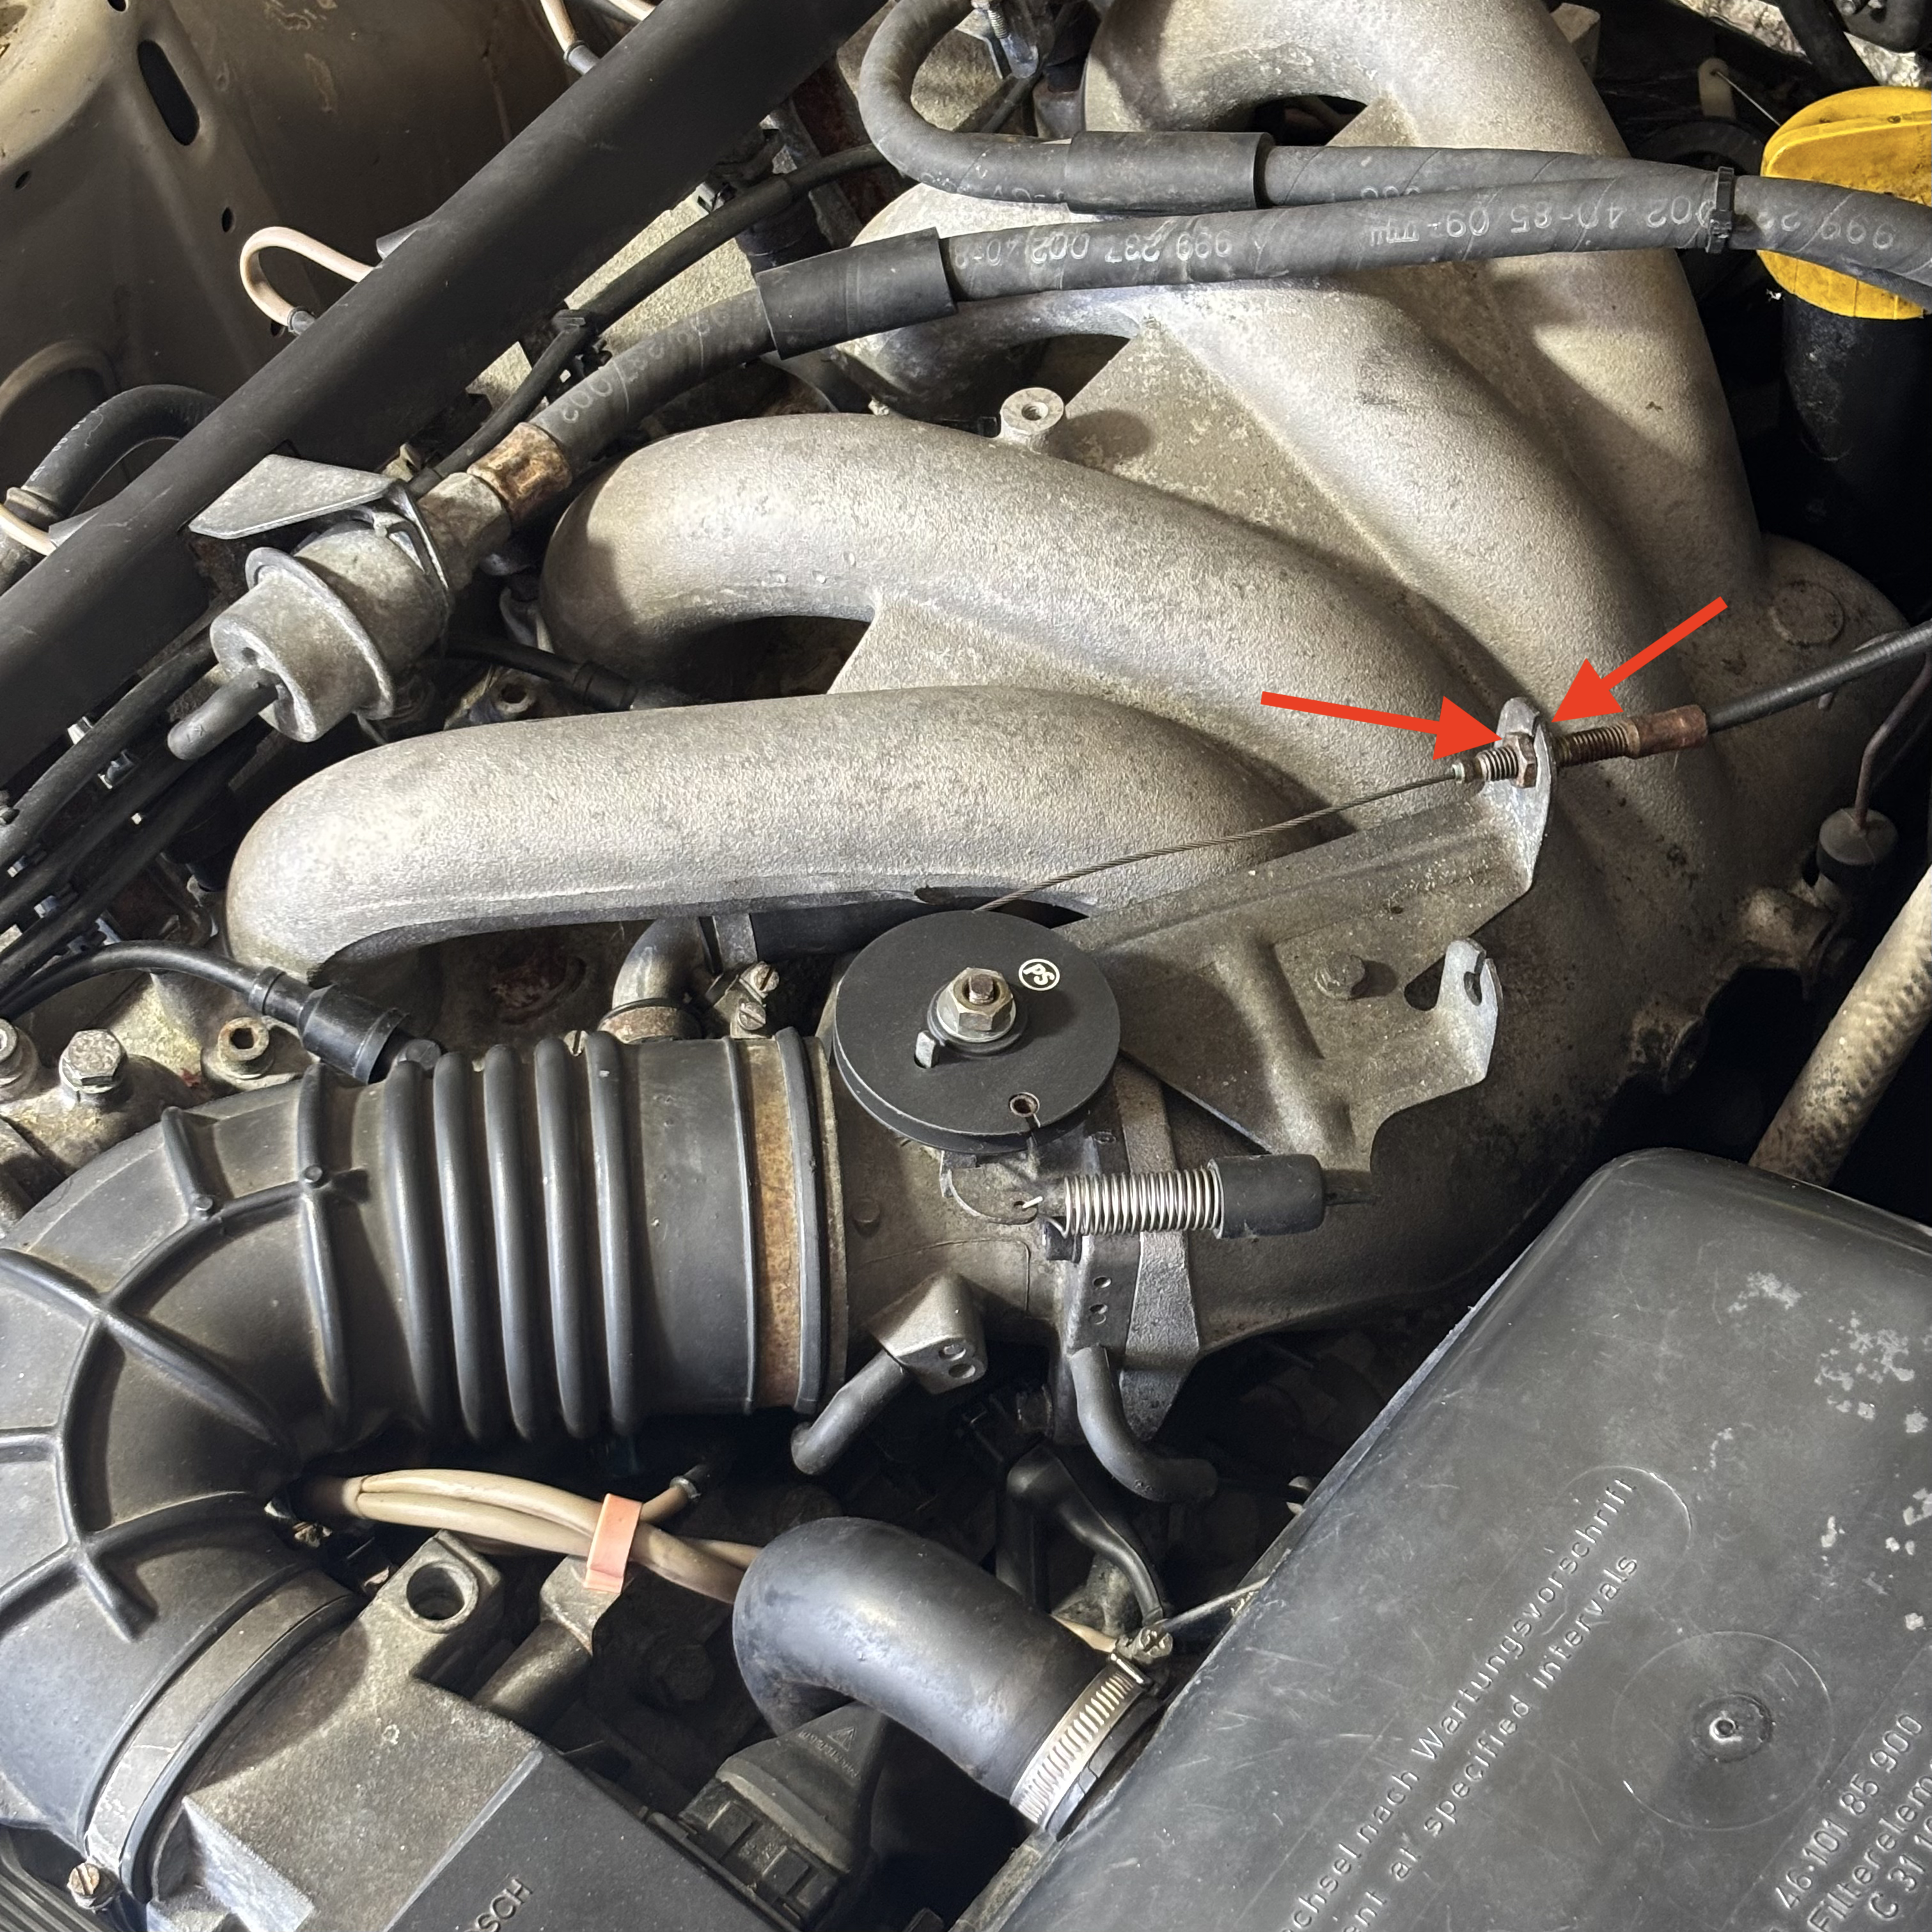
| 5 | Throttle cable adjustment varies by model. If your adjustment setup does not look like the photo, go to step 6. If your adjustment setup matches the photo, adjust the two nuts on the throttle cable adjuster (indicated by red arrows) to remove cable slack. IMPORTANT: Do not overtighten the cable. The throttle cable must have a small amount of slack. This allows the throttle plate to close fully and the engine to return to normal idle. |
 |
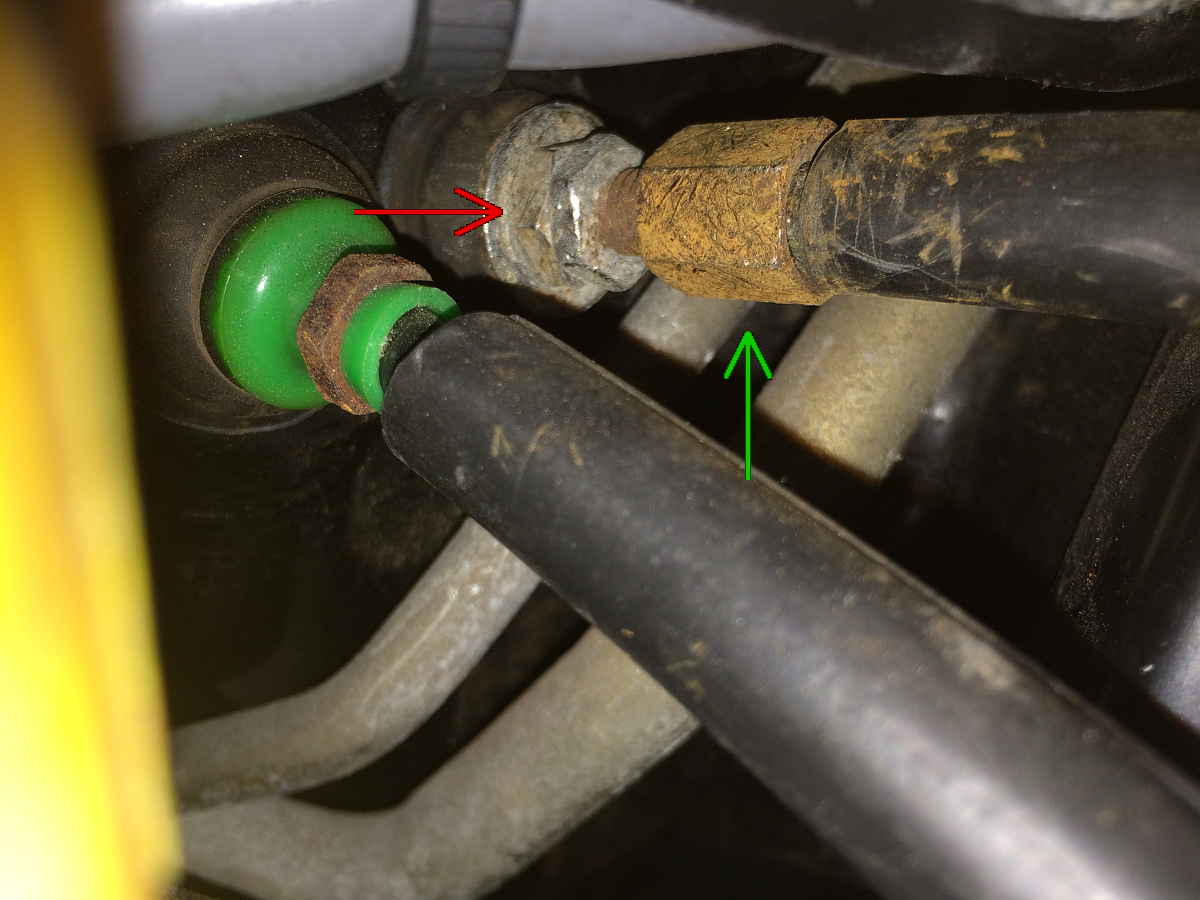
| 6 | If your adjustment setup does not look like the photo in step 5, follow the throttle cable sheath until you find the adjustment nut on the firewall in the engine bay. Loosen the two locknuts indicated by the red arrow. Then loosen the adjustment nut indicated by the green arrow until the cable is taut. IMPORTANT: Do not overtighten the cable. The throttle cable must have a small amount of slack. This allows the throttle plate to close fully and the engine to return to normal idle. |
 |
| 7 | Using a 19 mm wrench, adjust the plastic stop screw under the accelerator pedal. Press the accelerator pedal to the floor until it stops. Then loosen the screw until it touches the pedal. Loosen it slightly more (about 1/4 turn). | 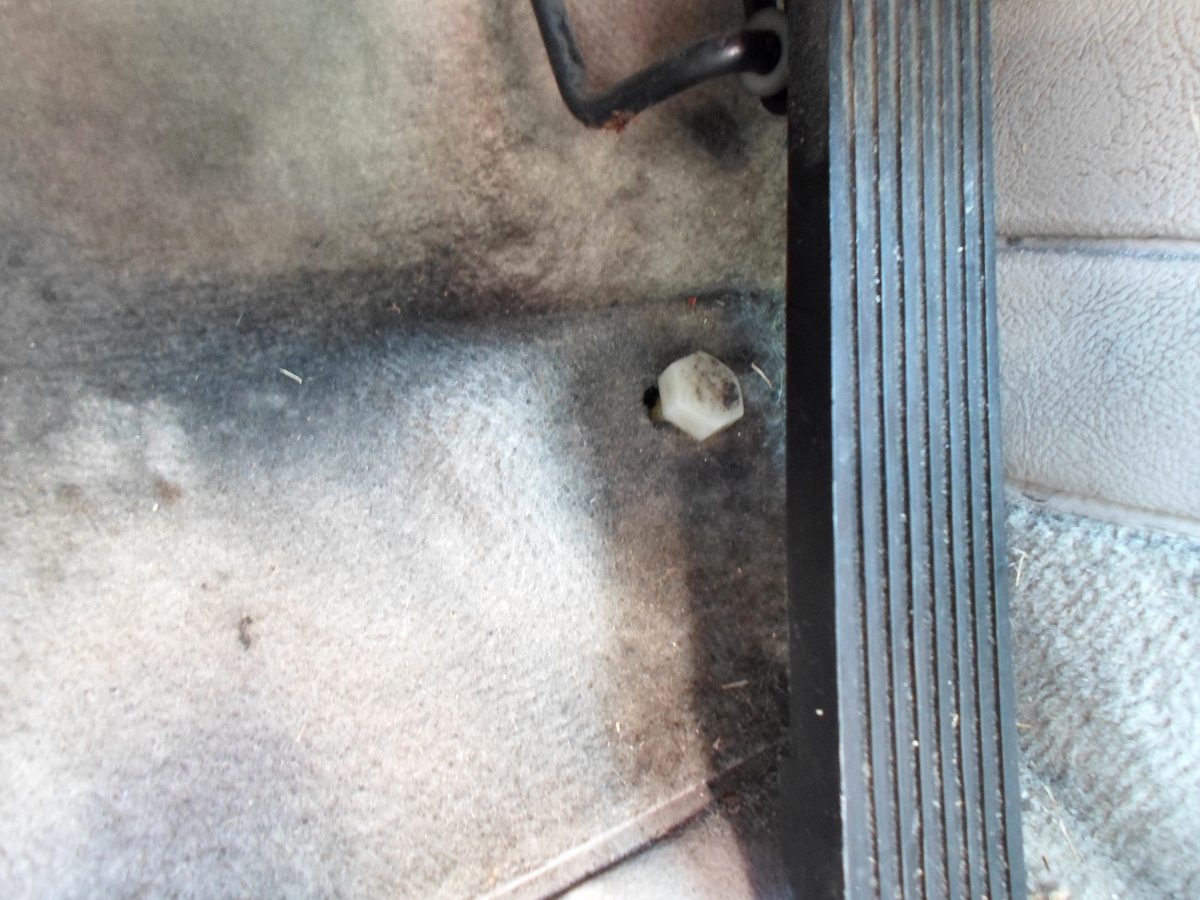 |